
Push-ups are great exercise for the whole body and research has shown that being able to perform push-ups is a good indicator of your ability to maintain fitness into older age. Scientists have also noted that push-ups can provide seniors with the strength and muscle memory necessary to break a fall. But did you know that push-ups are particularly good for building your core strength? And that building your core strength is one of the keys to preventing low back pain?
However, it’s also very easy to do push-ups incorrectly, which can actually lead to pain in your shoulders and back. Metabolic trainer B.J. Gaddour, C.S.C.S. says “Unless they’ve had instruction before, I’ve never seen someone off the bat do a push-up perfectly. I see 99.9 percent of people do it wrong.”
So here we provide you with 5 great tips to doing better push-ups.
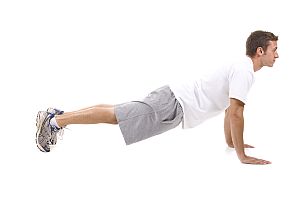
1) Be sure your hips don’t sag. Your head, shoulders and hips should all be in a straight line as you perform your push-ups. If your hips droop, it could cause lower back pain and you will not gain as much core strength as you would if you kept head, shoulders and hips aligned. To help keep this from happening, tighten your gluteal muscles (the buttocks) and your abdominals as you perform your push-ups. (It should also be noted that your hips should not be sticking up, creating an inverted “v” shape).
2) Keep your elbows close to your sides. If you look like a “t” from above, with your elbows splayed out like wings, you could be causing damage to the rotator cuff of your shoulder. Although this is how many of us were taught to do push-ups in school, it’s not correct. If you have trouble keeping your elbows close to your torso, try doing push-ups on your fists, with the back of your hands facing out. This helps to keep your elbows from splaying.
3) Go as low as possible. Your elbows should ideally be at somewhat less than a 90-degree angle when you are at your lowest point. If you have trouble doing this initially, put a block or similar object beneath your chest for a reference. Then gradually reduce the size of the object as you develop the strength to go lower.
4) Start off easy. Many people do not yet have the strength to do even a single push-up on the floor and resort to so-called “knee push-ups”. Unfortunately, this will not help you gain the strength you need for regular push-ups and your body will not benefit as much from the effort. Instead, you can begin by doing push-ups against a wall, countertop or staircase and then gradually work your way to progressively lower (more horizontal) positions until you’re able to do a push-up on the floor. This is a great milestone!
5) Stretch your wrists. Putting all your upper body weight on your wrists can hurt after a while, since most of us are not accustomed to it. Give your wrists some relief by stretching them. While on your knees, place your hands palm-downwards, with your fingers pointed back toward your knees, lightly putting pressure on them to help stretch in the opposite direction to the way they are positioned during a push-up. This will allow them to support more weight for your next set.